Administration
The MLOps - Craft AI Platform is composed of a graphical interface allowing you to visualize, create, manage and monitor the objects necessary for the realization of your AI projects.
It is composed of:
- Homepage: Visualize and create projects.
- Parameters: Manage the company’s account and users.
- Project settings: Manage the configuration of a project.
- Environments: See the environment(s) and their information within a project.
- Executions: See the execution(s) and their information within an environment or a deployment.
Note: We strongly recommend Google Chrome browser to use the graphical interface of the platform.
Summary:
Users
Summary:
Manage user
The management of user is available by email for the moment. In a next version, it will be possible to add, edit and delete a user directly on the platform UI.
Add a user
Send a message to Craft AI with your request and the following information:
- First and last name of the user
- Email of the user
Note
Adding users will arrive later on the platform.
Access rights
Each user has access to one or more defined projects.
Each user who has access to a project has access to all the information and actions in it.
Note
Advanced access rights will arrive later on the platform.
Delete a user
Send a message to Craft AI with your request and the following information:
- First and last name of the user
- Email of the user
Note
The deletion of users will arrive later on the platform.
Login
Here is the URL to access the platform: https://mlops-platform.craft.ai
First connection
Prerequisites: The user must be added to the platform (Add a user).
- The user connects to the platform: https://mlops-platform.craft.ai The connection will not work, but Craft AI will receive the request and can add the user.
- The user receives an email/slack from Craft AI to inform him that he can log in.
- The user logs in with the same link and has access to the platform.
Forgot your password
- In the Login popup, click on Don’t remember your password?
- Enter your email, you will receive an email to modify your password.
Get user with ID
Function definition
While using the SDK you may encounter outputs parameters containing a user when using specific functions. Each user is identified with a unique ID. That is the case for example in the sdk.get_pipeline_execution() function output with the parameter created_by. To match the user ID with the corresponding information (name and email) you can use the get_user() function.
Parameters
user_id(str) – The ID of the user.
Returns
The user information in dict type, with the following keys:
id(str): ID of the user.name(str): Name of the user.email(str): Email of the user.
Projects
A project is a complete use case. From data import, through experimentation, testing and production, to performance monitoring over time.
Users can create as many projects as they want. Each project is completely isolated from the others.
To work on a project, it must include at least one environment. The user can create several environments in a project.
Summary:
Create a project
-
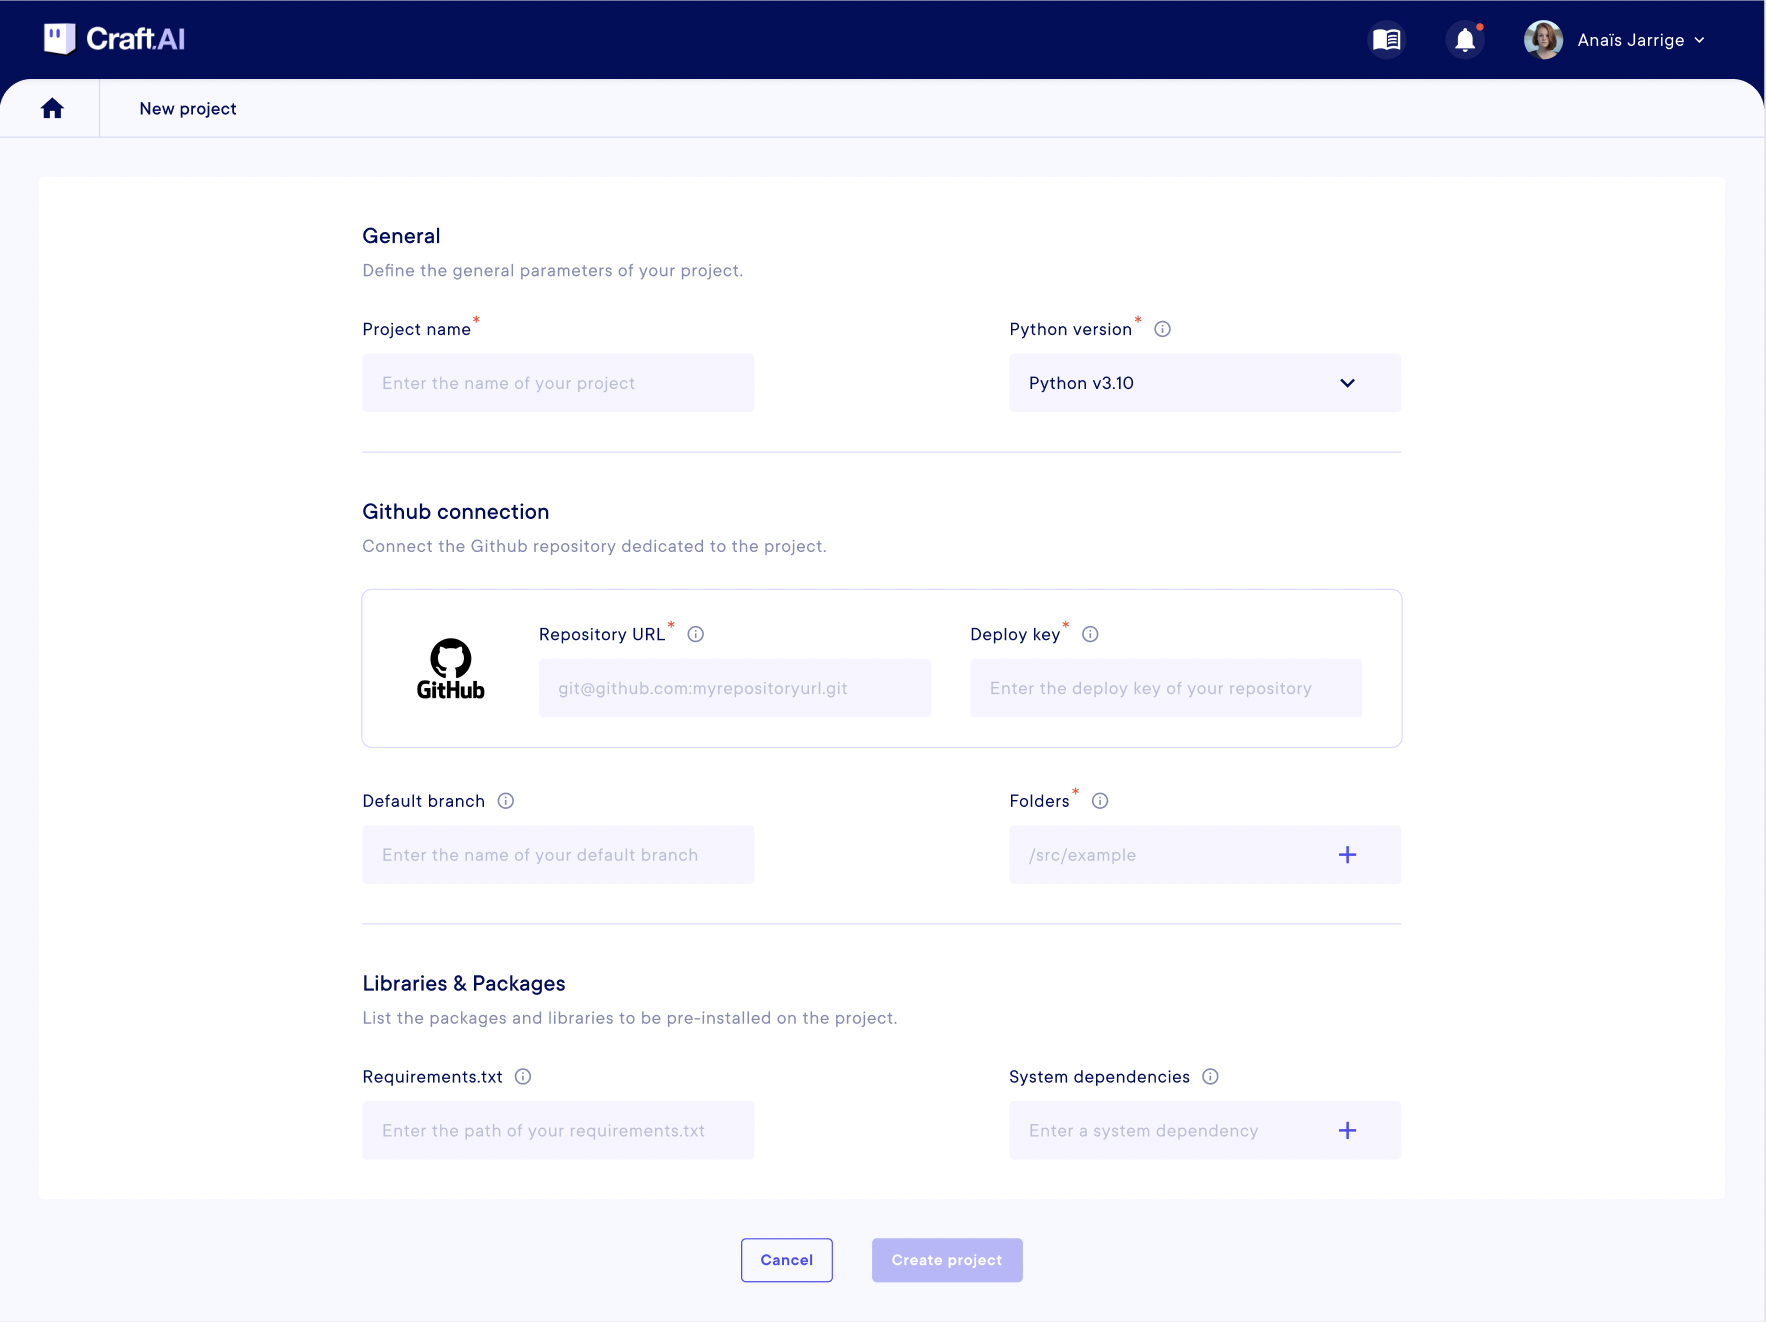
From the homepage, you can create a new project by clicking on the “New project” button.
-
A project creation page opens in which you have to fill in the fields :
- [Mandatory]
Project name: Enter the name of your project (in lowercase and with “-”), you will not be able to modify it later.
The following properties are default settings for the pipelines that will be created in this project, so you won't need to configure them each time you create a pipeline. It will always be possible to override these settings separately for each pipeline.
-
[Mandatory]
Python version: Select the version of Python that will be applied to this project. It will be possible to choose a different version when creating each pipeline. -
Repository URL: The SSH URL of a Git repository that contains code for your pipelines, starting with “git@”. When creating pipelines, it will also be possible to send code directly to the platform or to choose a different Git repository URL. -
Deploy key: GitHub / GitLab private key to access a Git repository that contains code for your pipelines. -
Default branch: The Git branch where to get pipeline code by default for this project. If this field is empty but a Git repository is used to get pipeline code, the platform will use the default Git branch. It will be possible to choose a different default branch within an environment. -
[Mandatory]
Folders: File(s) or folder(s) that will be included in pipelines, among the ones fetched from Git by the platform or sent by the user directly. By default, it will contain the value/, which means all the files in the folder or repository are included. It will be possible to choose different files or folders within an environment. -
Requirements.txt: The path to the requirements.txt file with the Python libraries to install automatically on this project, among the pipeline files included in the folders defined above. It will be possible to choose a different file within an environment. -
System dependencies: List of APT packages that you want to install automatically on the Linux system where pipelines will run in this project. It will be possible to add different packages within an environment.
Note
For more information on how to link pipelines with a Git repository, the full procedure is available here.
- [Mandatory]
-
Click on “Create project”, you will see the project card displayed, and you can enter in it to create a first environment.
There are no access rights at first, all users of the platform have access to all projects.
Note: You will be able to modify these elements (except the project name) in the Settings section of your project.
Next step: Create an environment in this project.
Manage a project
Edit a project
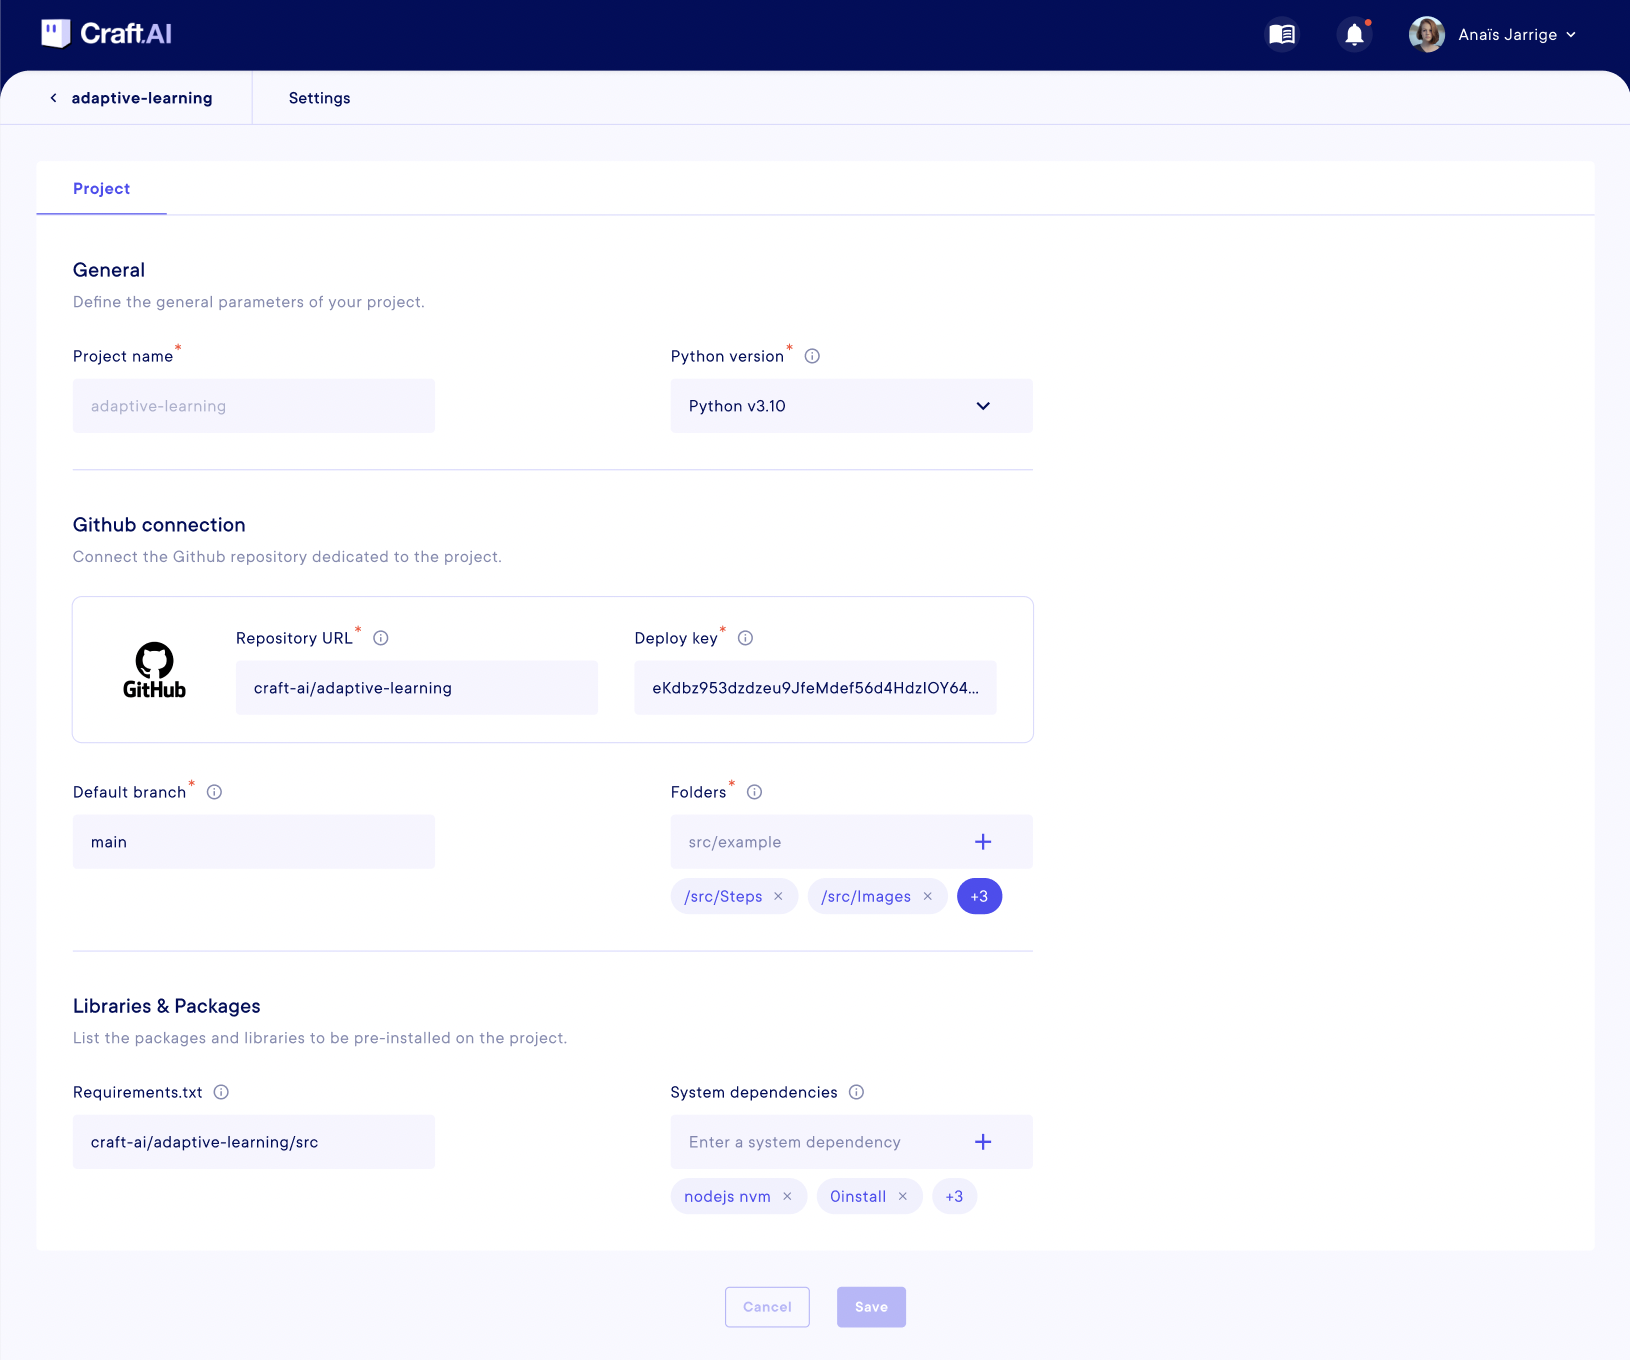
Within your project, click on Settings to view and edit your project information.

On this page, you will find the information you set up when you created the project.
You can change them, except the name of the project.
Warning
Don’t forget to save and validate the confirmation slider to make the changes effective.
The changes will apply to pipelines created after this modification. These changes may affect your pipelines and can make them non-functional.
Users in a project
Initially, all users of the platform have access to all projects without special access rights.
Note
The access rights per user within a project will arrive later on the platform.
Delete a project
Initially, you cannot delete a project.
Submit an email request to delete a project from the platform.
Note
The deletion of a project will arrive later on the platform.
Access the SDK
The Craft AI MLOps Platform is composed of a Python SDK allowing you to use, from your IDE, the functions developed by Craft AI to create your pipelines and deployments.
Summary:
Get token access
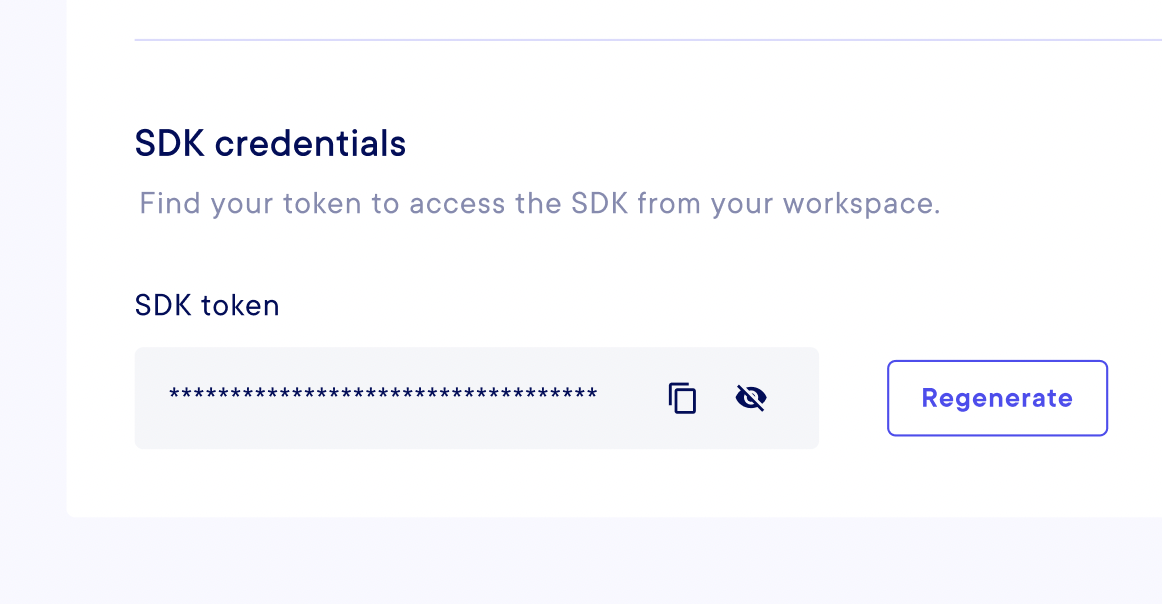
In the header, click on your name and go to the “Parameters” page.

At the bottom of the “Account” page, you will find your SDK token, which will allow you to identify yourself to use the SDK.
You can regenerate it, the old token will be obsolete, and you will have to identify yourself again to the SDK to access it.
Warning
The SDK token is strictly personal. You must keep it to yourself.
Connect to the SDK
You must install the SDK from a Python terminal, with the command :
Run the following commands in a Python terminal to initialize the SDK.
- Enter the
CRAFT_AI_ENVIRONMENT_URL, you can find on Get environment URL.
It should look like https://brisk-hawk-charcoal-zeta-42.mlops-platform.craft.ai.
If you don’t have any environments in your project yet, you should Create an environment.
- Enter your personal
CRAFT_AI_SDK_TOKEN, you can find it in "Parameters" on the platform web UI.
- Execute the following Python code to set up SDK Python object.
The SDK will automatically take into account your environment variables for the installation of the connection to the platform.
You can also specify it directly in the constructor, although this method is not recommended.