Deploy a self-hosted LLM with a template
As Large language models are becoming more and more relevant for our users, the Craft AI team has prepared a library of state of the art open weight models to be deployed and self-hosted on your GPU environments.
Note
The self-hosted templates can only be deployed :
-
On GPU environments.
-
If your environment has enough available VRAM (check your failed deployment's logs to identify if it is the failure's cause).
The self-hosted models are typically available in :
- 16bits, 8bits quantization (W8A8-FP8)
- 4bits quantizations (W4A16-INT4 and W4A16-FP4)
These quantizations will allow you to deploy LLM on smaller sized environments in order to save on resources and have better inference time without losing too much in performances.
What is a template?
A template is a new object that contains the python code and a configuration tailored by Craft AI to allow our users to deploy a LLM right away. No needs to write your own code, create a pipeline and then configure and create your deployement.
Its goal is to make this type of deployment as easy as possible, to skip most of the tedious part of LLM deployment in order to go straight to the configuration : system prompt, temperature and, in some cases, tool calling, multimodal configuration and structured output (all through the Input/Output part of the deployment creation process).
How to deploy a template?
Choose your model
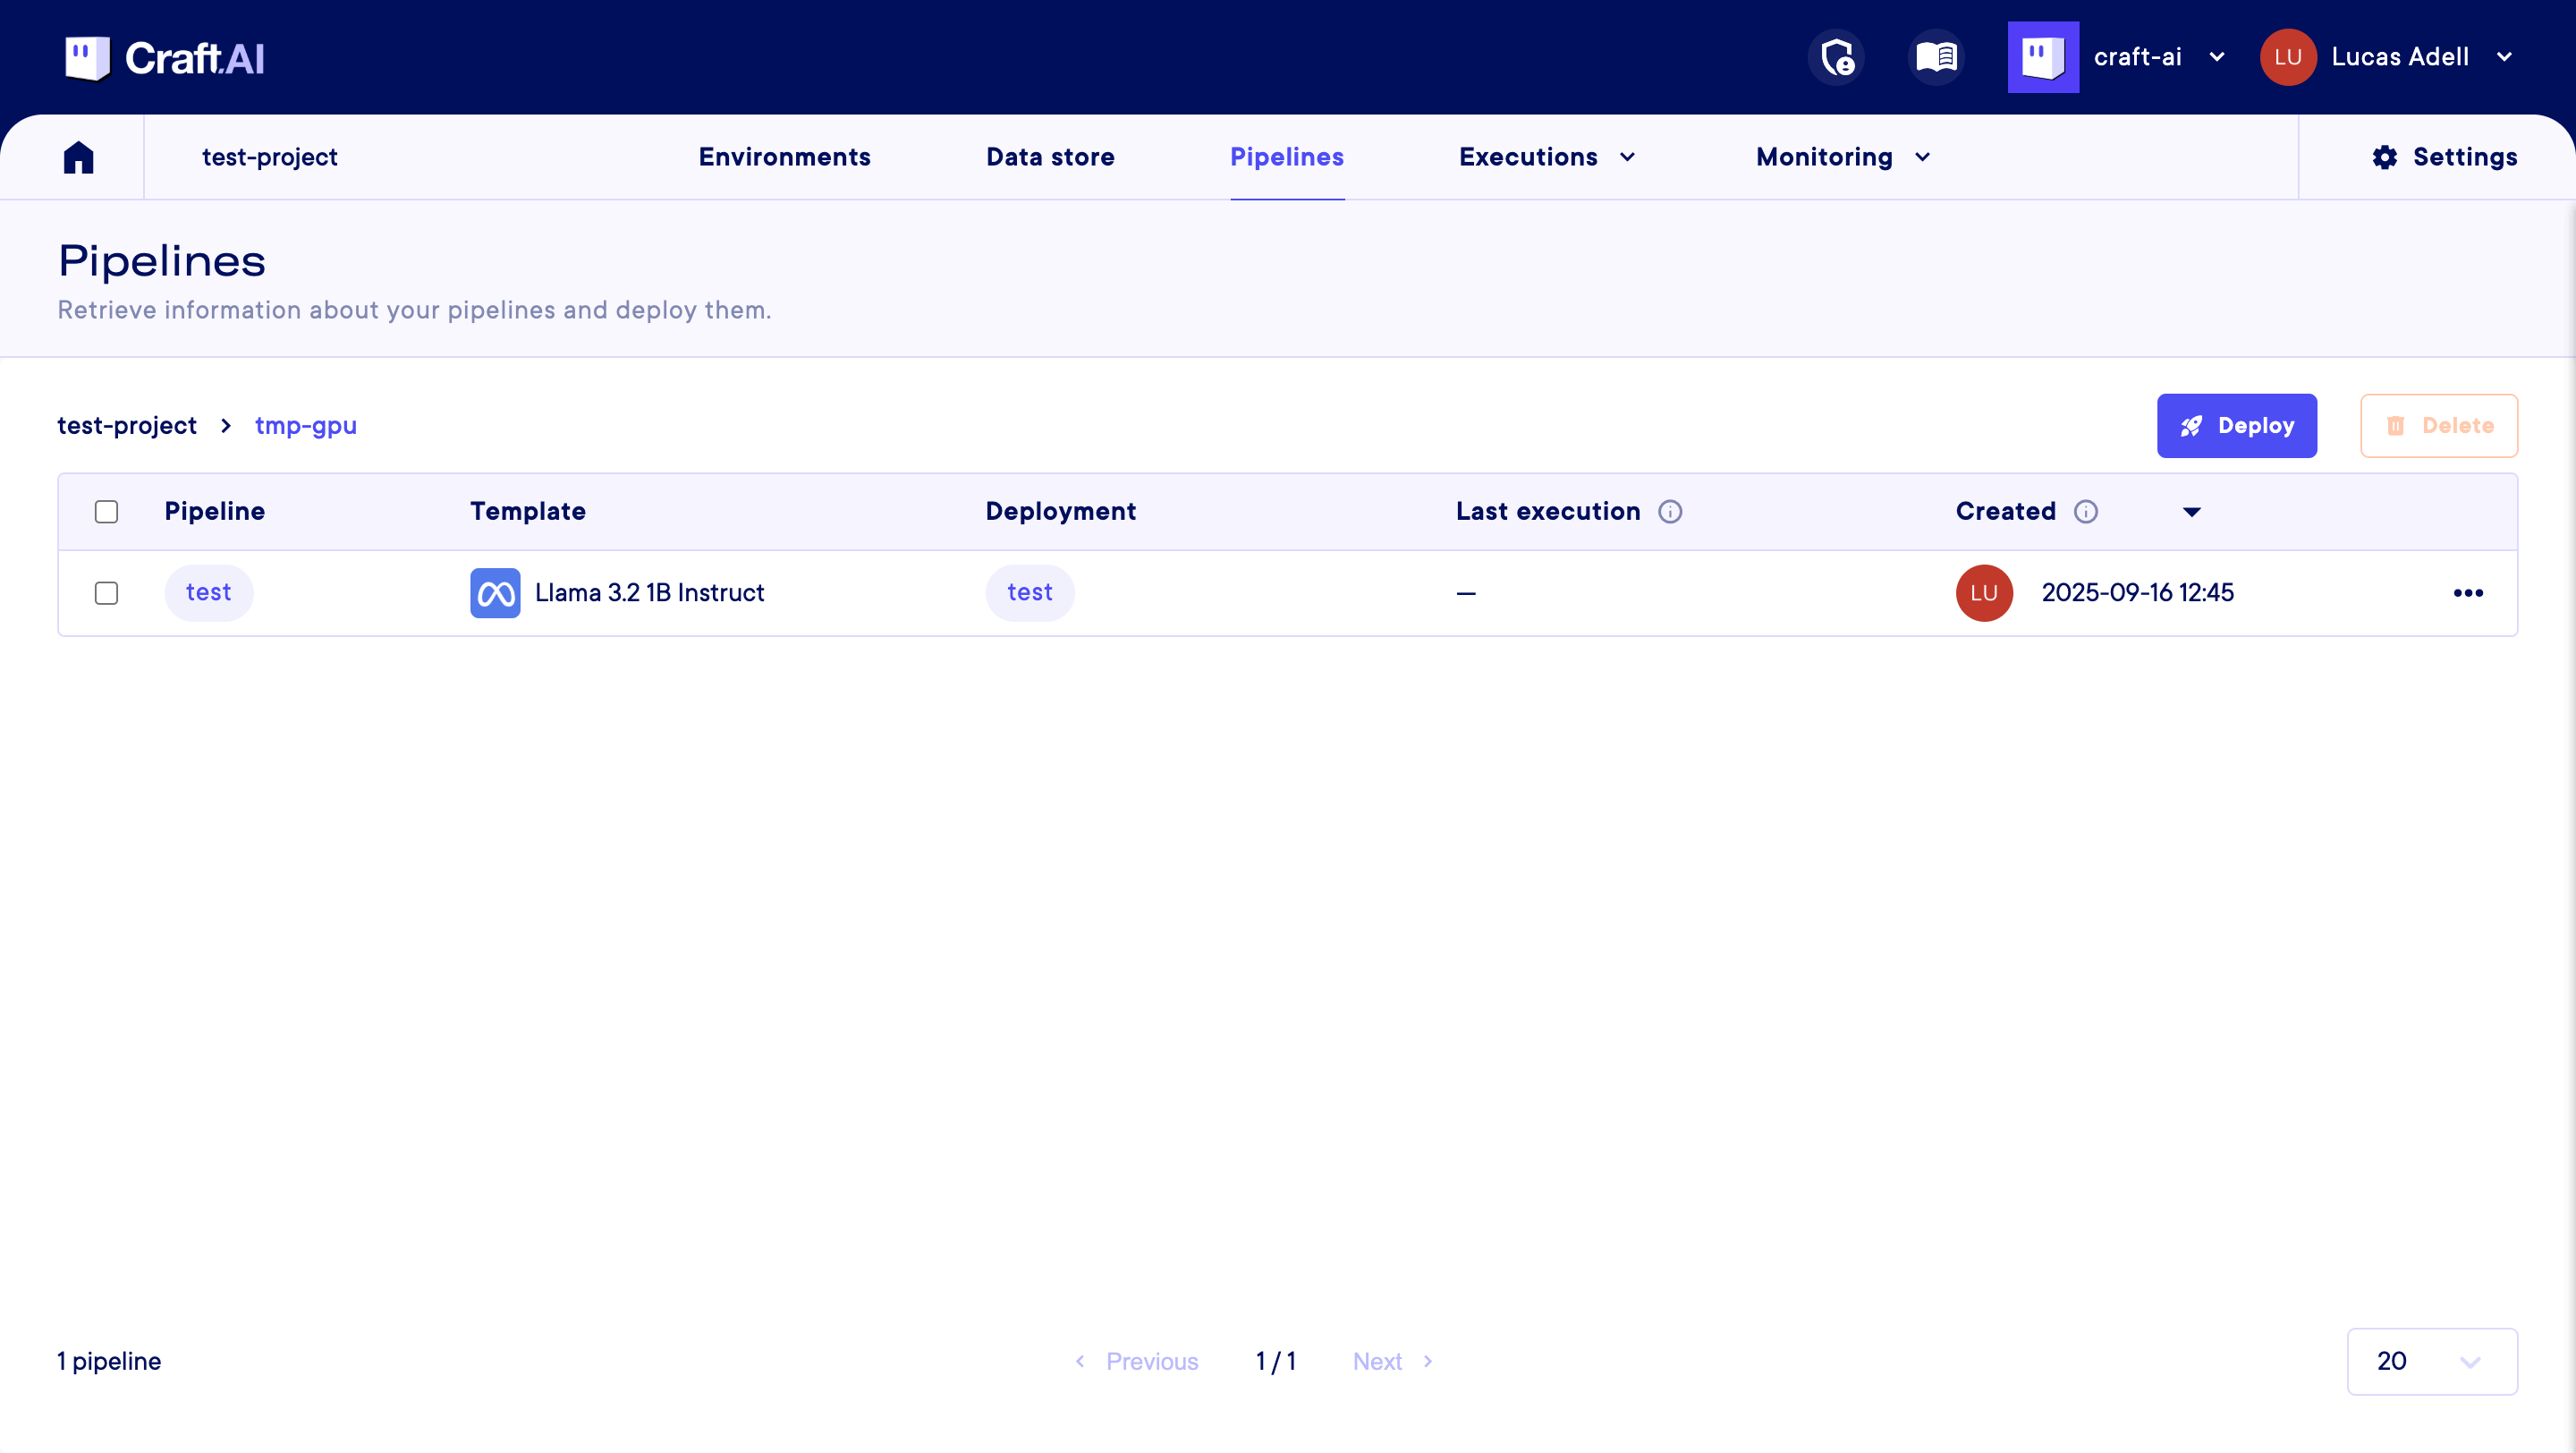
Click the Pipelines tab of the console header and access the pipelines table screen.
From there, click on the Deploy button to access the deployment creation screen.
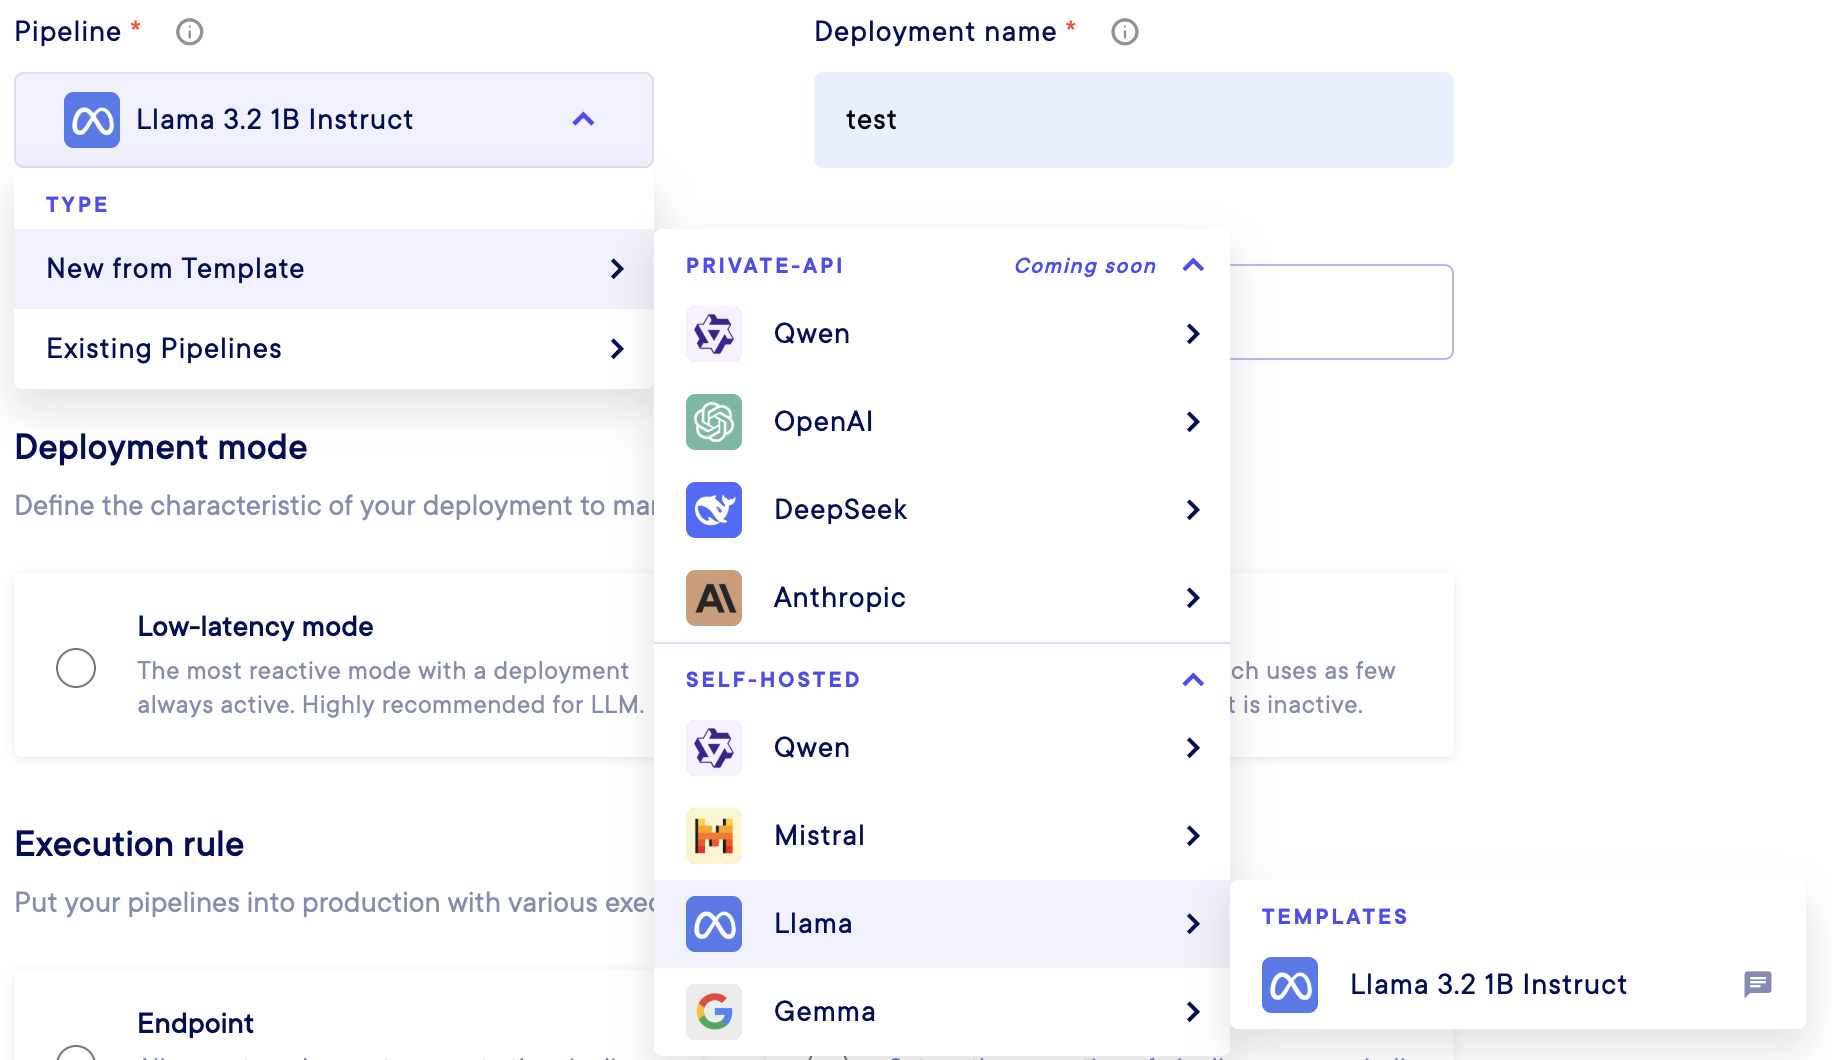
By clicking on the Pipelinedropdown menu you should be able to select the type of deployment you want to make between :
New from TemplateExisting pipeline
Note
As the template deployment will create a pipeline, you will be able to create another deployment from it after its creation succeeded.
However, as this type of deployment will use most of your environment resources, we strongly discourage you to do so or to deploy another model template while a model deployment is still enabled (which will most likely result in a creation failure).
From New from Template, you will see all the model providers for your self hosted models (API served ones aren't available yet). Then, you can select the model you want to deploy with its level of quantization :
Warning
Select carefully the model to deploy!
Deploying a model that is oversized compared to your environment resources will result in a creation failure.
Then refer to the Deployment section of this documentation to configure your deployment.
In order to deploy your model for a "classic" use case, we however advise you to use the Low-latency mode and the Endpoint execution rule. In the advanced settings of your deployment, if it failed a first time, try to set the GPU request to 1.
Configure your model
As mentioned before, model templates come with their simplified configuration tool as deployment's inputs and outputs. We chose to reduce the number of customisable settings in order to have the straightest model deployment experience possible.
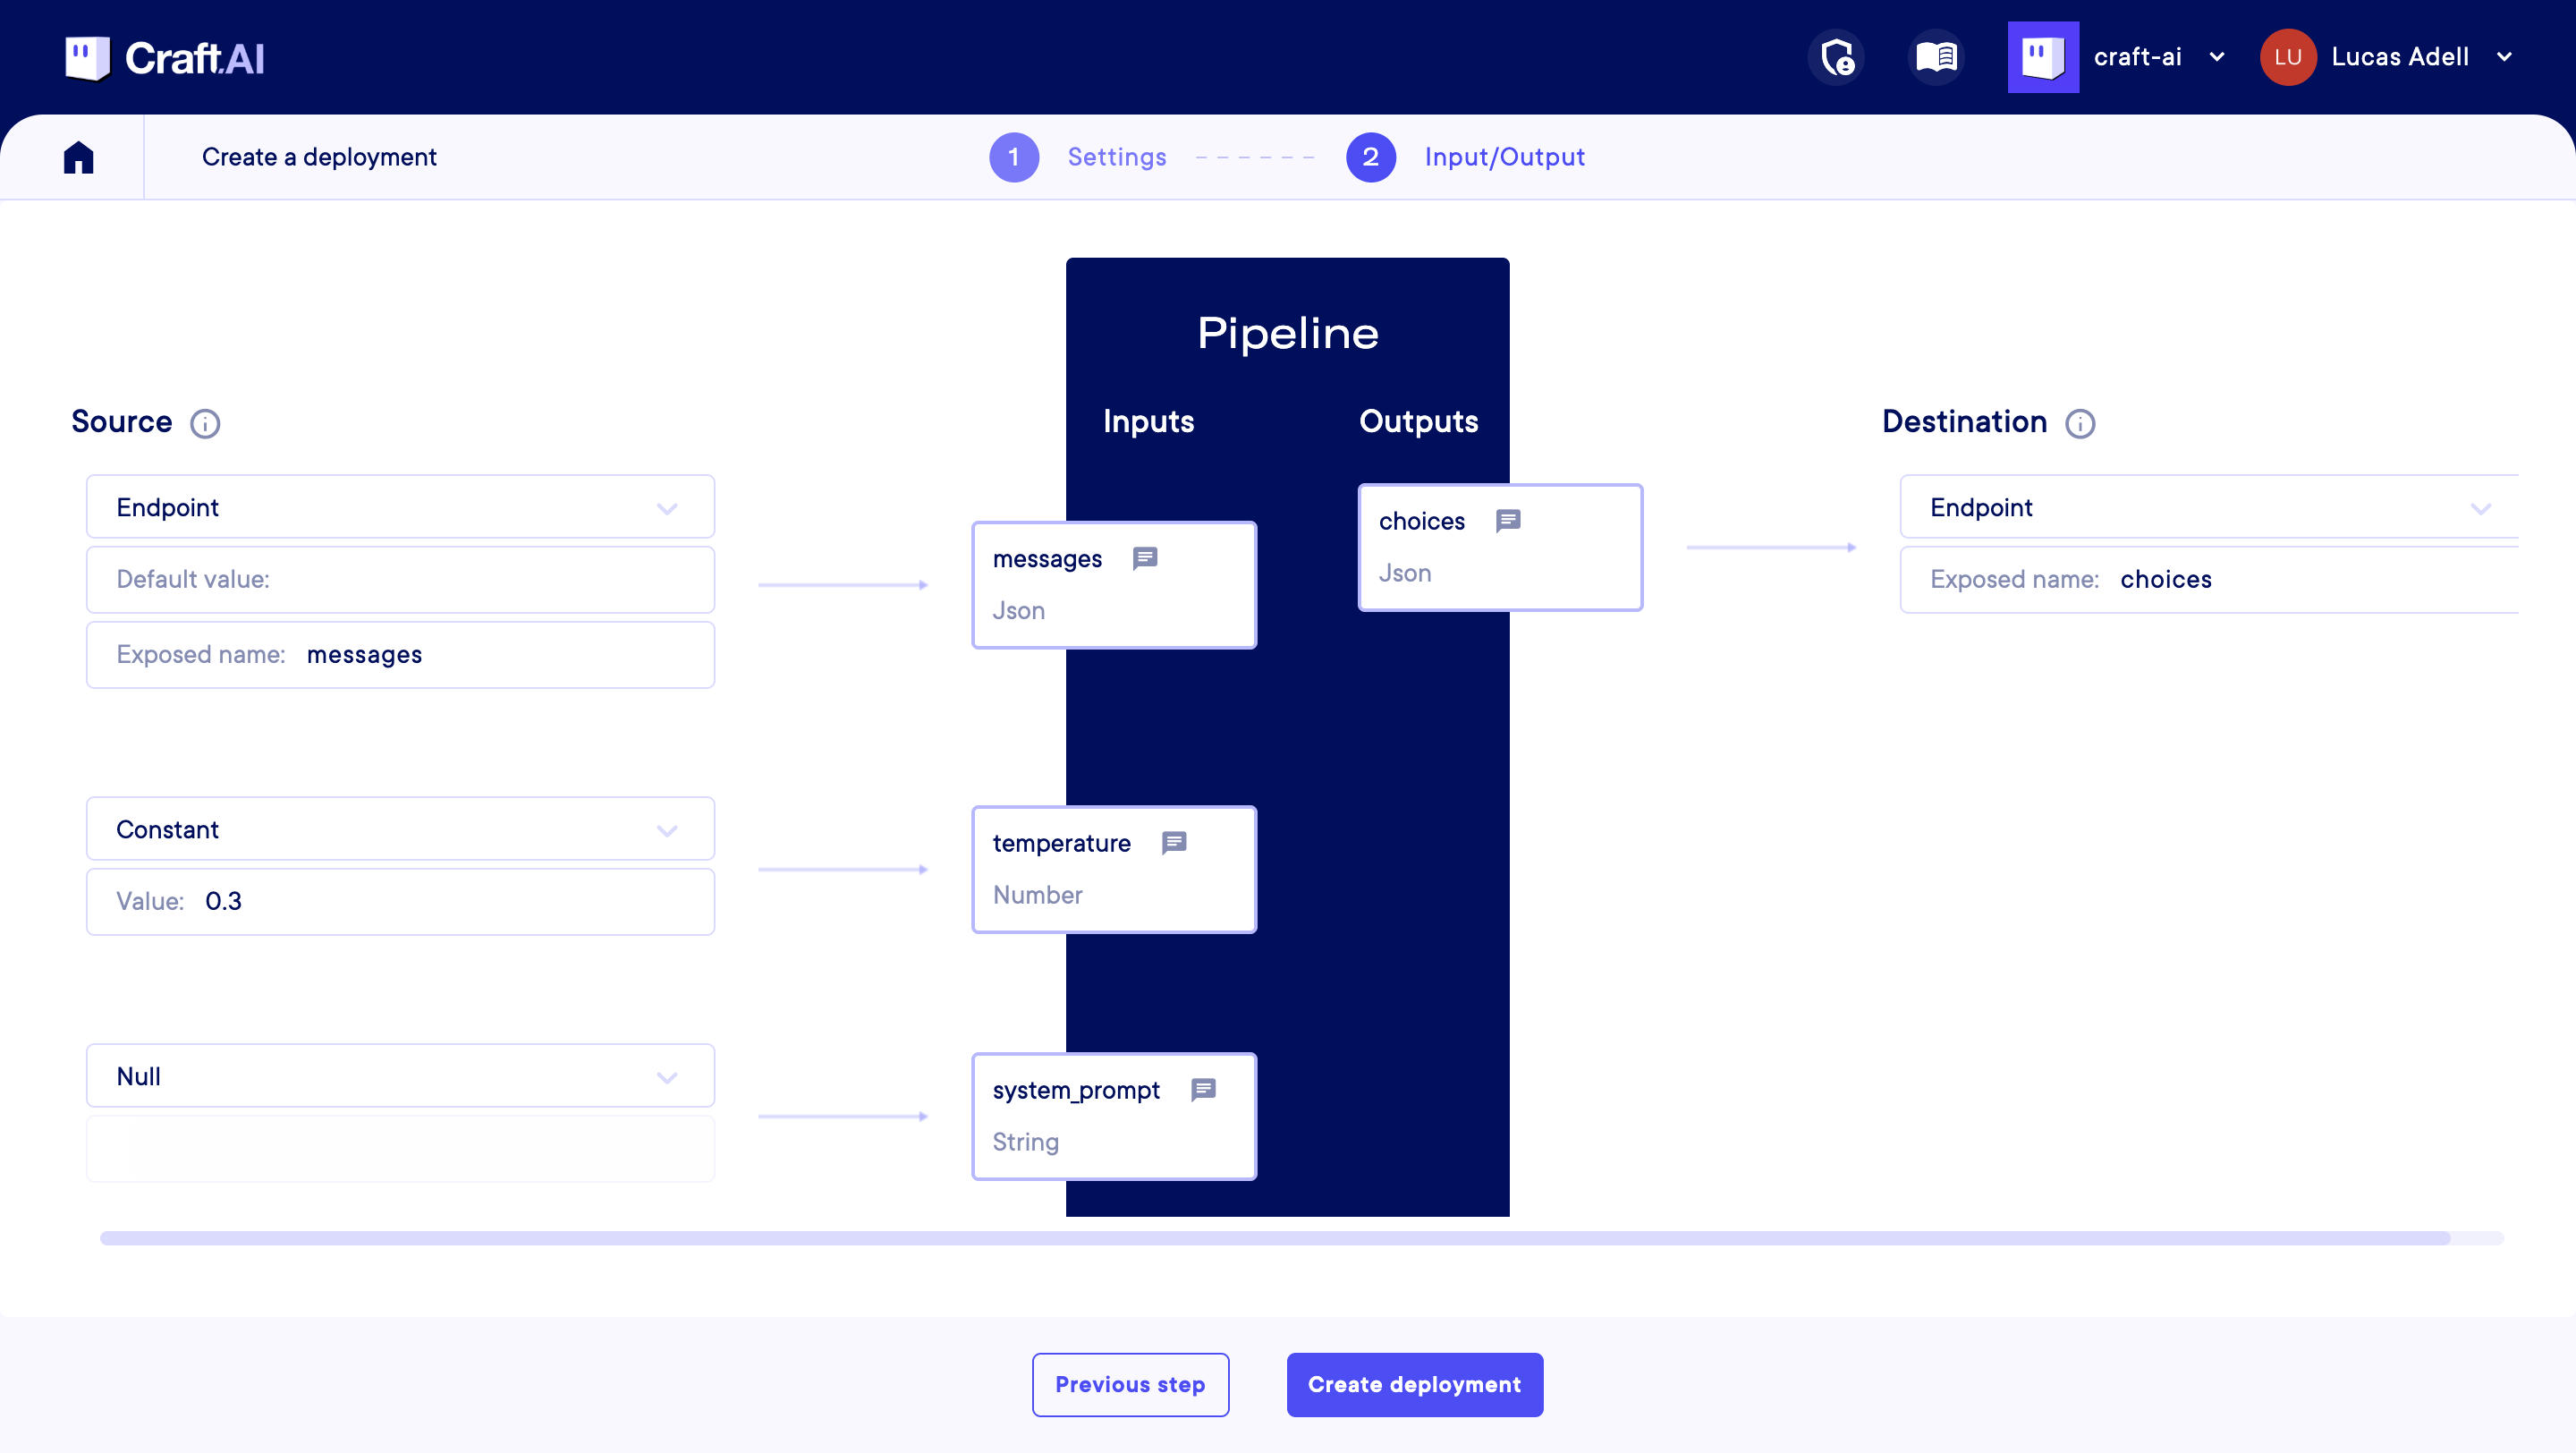
Here are the settings you can configure :
- Messages : A list of messages in the conversation, in OpenAI's chat format. Each message should be a JSON object with two keys: 'role' and 'content'. The 'role' can be 'system', 'user', or 'assistant', indicating who is sending the message. The 'content' is the text of the message. The messages should be ordered chronologically, starting with an optional system message to set the context, followed by alternating user and assistant messages. This input is required. When creating a deployment, please map it to an endpoint input of the same name. Please refer to the model's documentation for any specific formatting requirements or limitations on the messages.
- Temperature : The temperature controls the randomness of the model's output. A higher temperature (e.g. 0.8) makes the output more random, while a lower temperature (e.g. 0.2) makes it more focused and deterministic. When creating a deployment, you can map it to a constant value to fix the temperature for all executions. To use the default temperature of the model, map it to Null. To let the temperature be specified for each execution, map it to an endpoint input.
- System Prompt : An optional system prompt to guide the behavior of the model for the whole conversation. If provided, it will be included as the first message in the conversation with the role 'system'. This can be used to set the context or instructions for the model's responses. When creating a deployment, map it to a constant value to use the same system prompt for all executions. To let the system prompt be specified for each execution (via a message with 'system' role), map it to Null. It is not recommended to map it to an endpoint input, to keep an OpenAI compatible interface, and prevent conflict with messages with the 'system' role.
- Choices : The model's response choices, in OpenAi's chat format. It is a JSON object containing a list of choices, where each choice includes a message with 'role' and 'content'. The 'role' in the message will be 'assistant', indicating that it is the model's response. The 'content' contains the actual text generated by the model.
Note
Other settings will be added later regarding tool calling, structured output and multimodal ingestion.
Once you are done mapping your inputs and outputs, you can click the Create deployment button and your model's pipeline and deployment should appear in the Pipelines table (alongside the remplate you used to create it) :