Create & Manage a pipeline
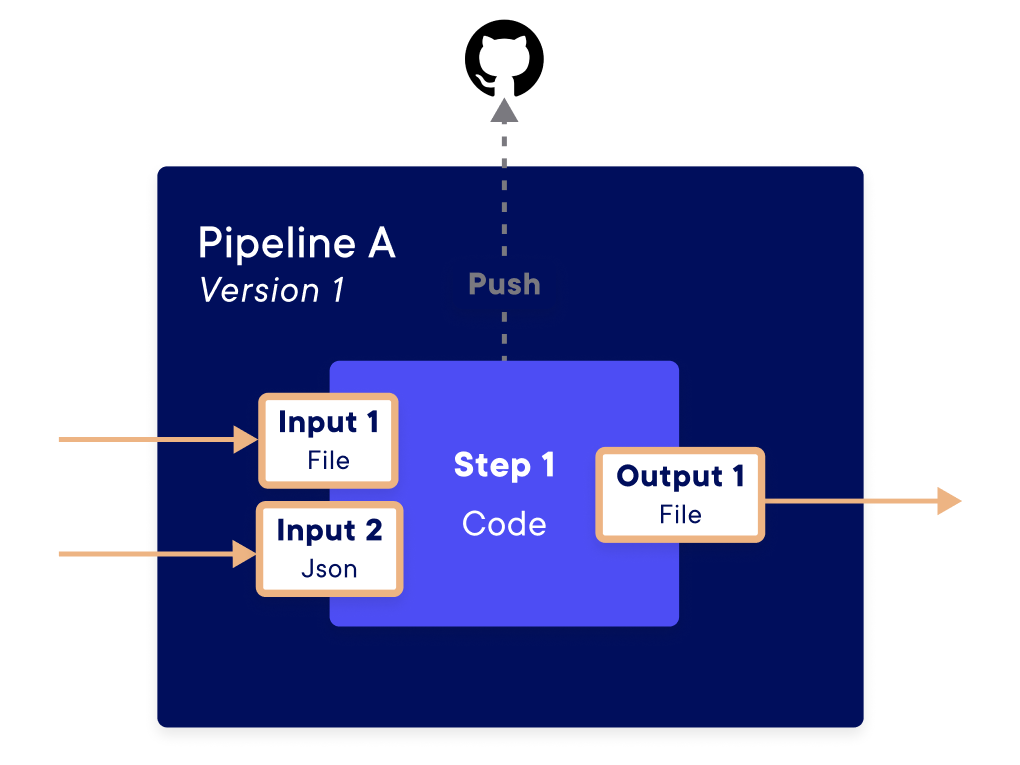
A pipeline is an component defined by its input and output parameters and by the processing it applies. In practice, a pipeline is a function with inputs and outputs coded in Python. The Python code used by the pipeline can be stored in a local folder on your machine or in a Git repository.
An input of a pipeline is an object you can use inside the code. An output of a pipeline is defined from the results of the pipeline function.
The pipelines are stored in a specific environment, and only people with access to this environment can read and write the pipelines. By default, each pipeline uses the values defined in the project settings. However, these values can be overridden in the pipeline creation parameters, as detailed below.
Create a pipeline
Generalities
You can create a pipeline by using the Python SDK. Once it's created, you will be able to see it on the Platform or to get information with the SDK. Try to put the code of each pipeline into a single different folder, which will be sent to the Platform.
Examples:
import numpy as np

def entryPipeline(dataX_input, dataY_input) :

    # Code

    return result_output
If you prefer, you can also use a GitHub repository instead of a local folder. More information can be found here.
A pipeline may need to receive some information or give some result (just like a function). To do that, we use Input and Output object that are specified at the pipeline creation. These objects allow defining the properties of the input or output that will be expected in the pipeline.
Example
Here is a code sample that defines Inputs, Output and a pipeline.
Info
For the full documentation of each SDK functions used here, please refer to the SDK Documentation.
from craft_ai_sdk import Input, Output

input1 = Input(
    name="input1",
    data_type="string",
    description="A parameter named input1, its type is a string",
    is_required=True,
)

input2 = Input(
    name="input2",
    data_type="file",
    description="A parameter named input2, its type is a file"
)

input3 = Input(
    name="input3",
    data_type="number",
)

prediction_output = Output(
    name="prediction",
    data_type="file",
    default_value="default,content,here",
)

pipeline = sdk.create_pipeline(
    function_path="src/foo.py",
    function_name="my_function",
    description="Apply the model to the sea",
    container_config = {
        "local_folder": "/users/craftai/",
    },
    inputs_list=[input1, input2, input3],
    outputs_list=[prediction_output],
        ## ...
)
Warning
- The size of the embedded code from your folder / Git repository must not exceed 5MB. If the data you want to import is larger than 5MB, you can use the Data store to store it and then import it into your pipeline.
- The size of Inputs must not exceed O.O6 MB (except for files).
Manage a pipeline
You have two ways of managing pipelines, with the SDK or in the Platform.
Info
For the SDK functions of listing the existing pipelines, updating or deleting a pipeline, please refer to the SDK Documentation.
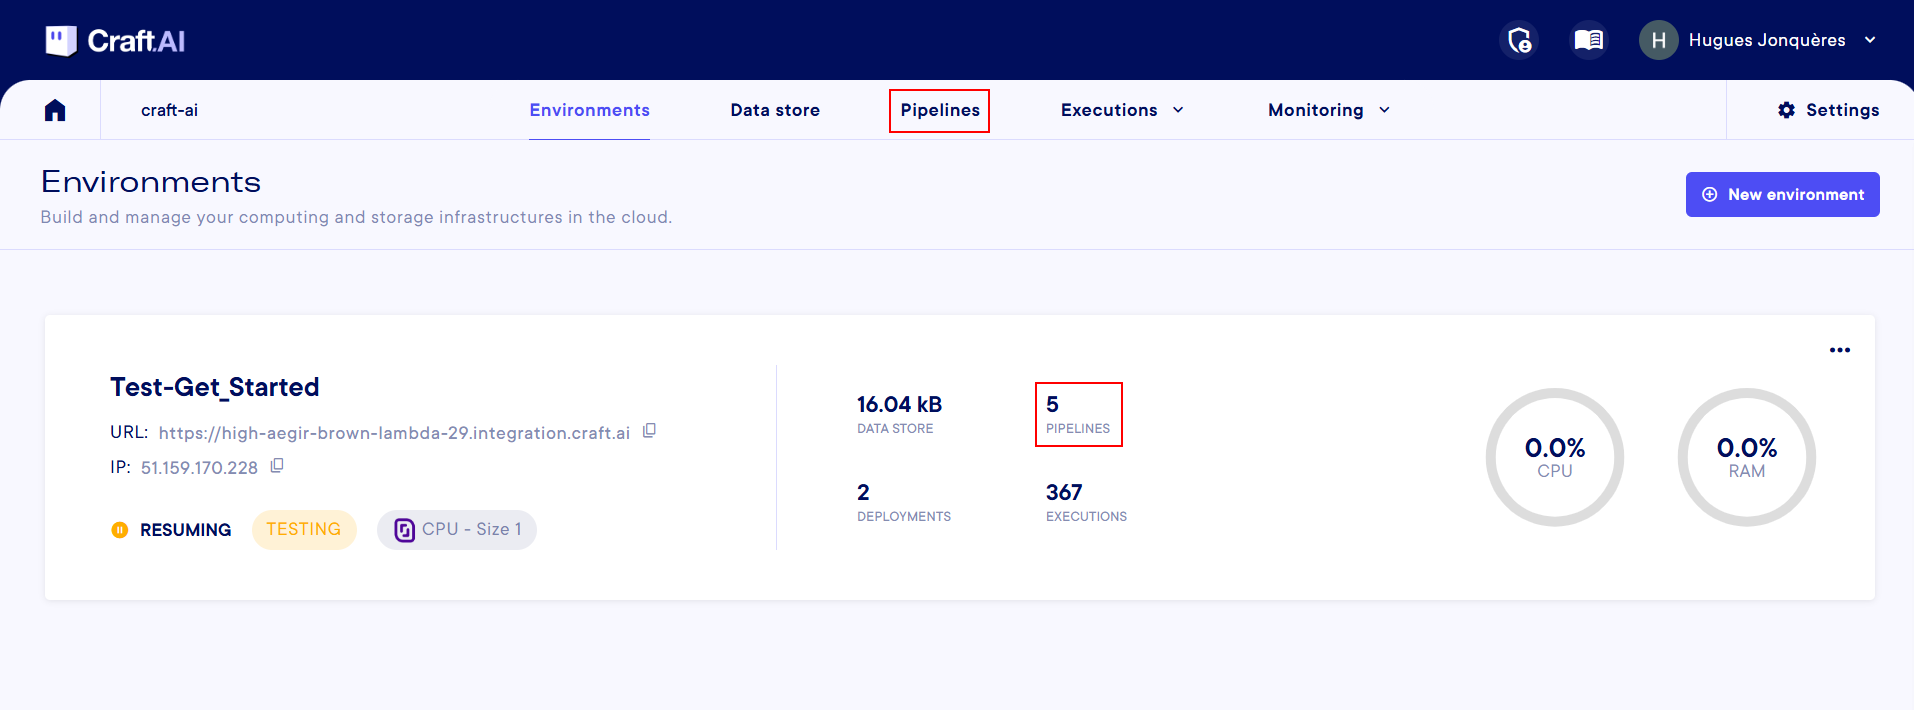
In the Platform, you have two ways to access your pipelines from the Project screen :
- the
Pipelinemenu, in the top bar, betweenData storeandExecutions. You then need to select the specific environment in which the pipelines you want to work on are stored. - Directly in each
Environment, when you click on the number right abovePIPELINESin the middle section of each environment
Then, you arrive on the Pipeline's page. Here you have a list on each pipeline that exists on the environment you specified, and some information like its deployment name if it is deployed, its last execution, its creator and creation date.
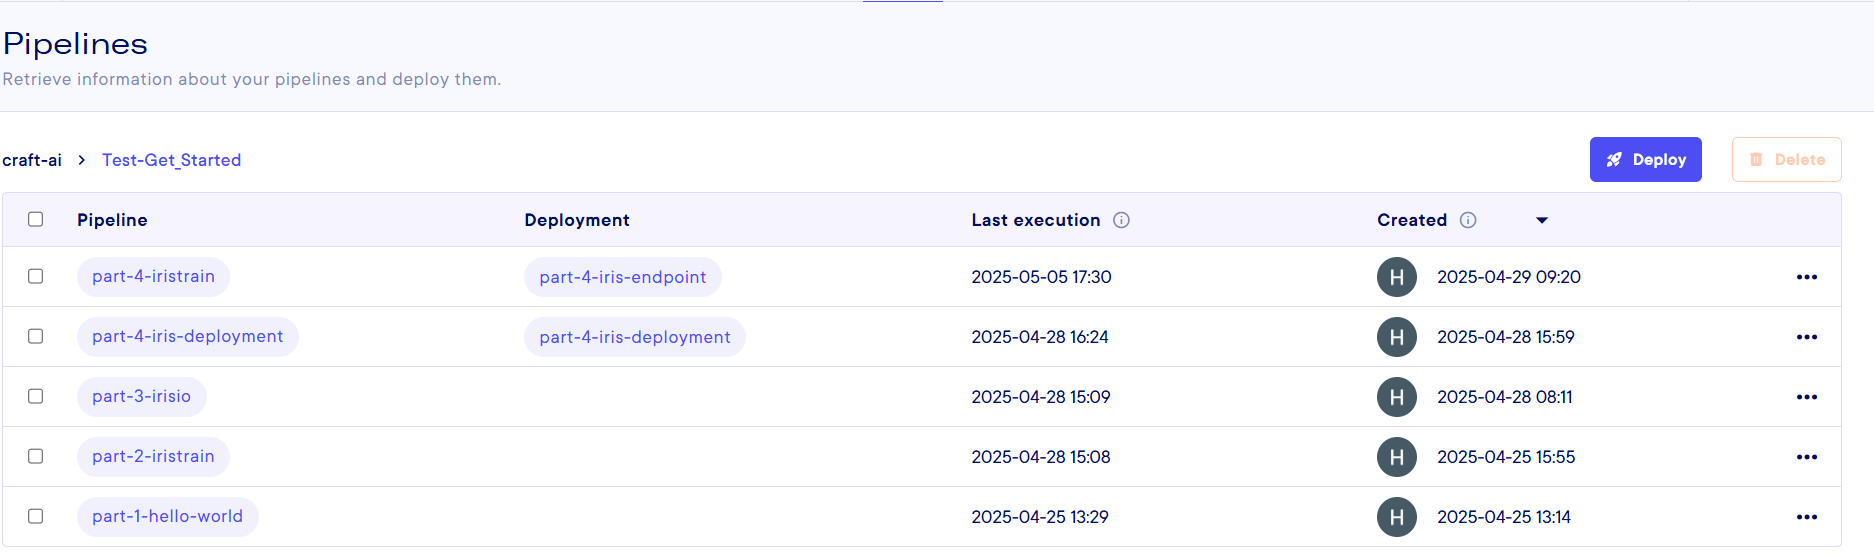
information
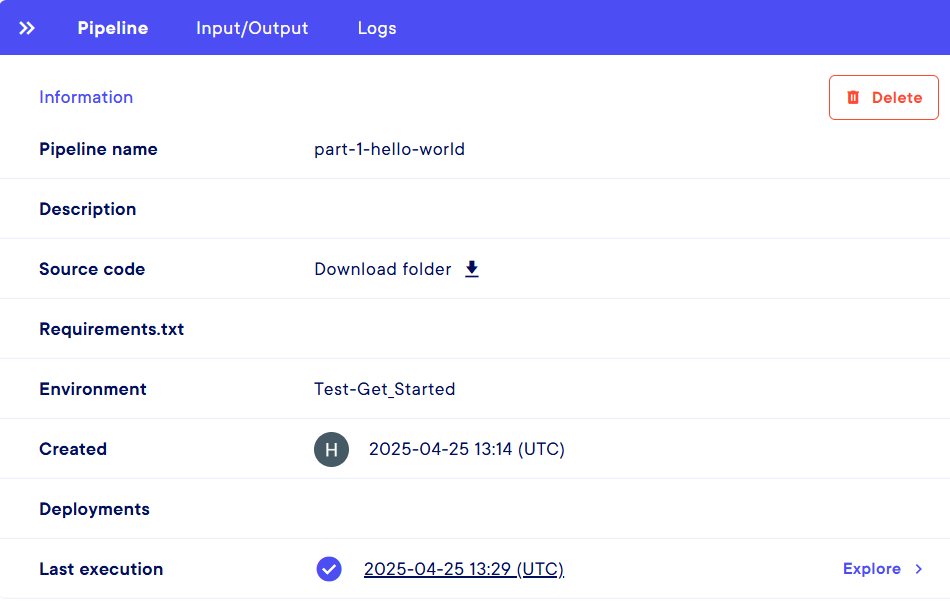
You can do several things on this page. Let's start with displaying information. If you click on any pipeline name or use the "..." menu at the right end of each line and select Pipeline information, you are presented with a side-panel listing 3 kind of information :
- The
Pipeline information- Pipeline name : name specified at the creationg
- Description : if provided during the creation
- Source code : To download the folder containing all of the pipeline code in
.tgzformat - Requirements.txt : if you specified a file during the creation
- Environment : Name of the environment in which the pipeline is created
- Created : Creation date, time and creator
- Deployment : if there is an associated deployment, you can access it by clicking
- Last execution : Last execution date, time and status. There is an
Explorebutton to go to the logs. or you can click on the timestamp. More information on the Executions.
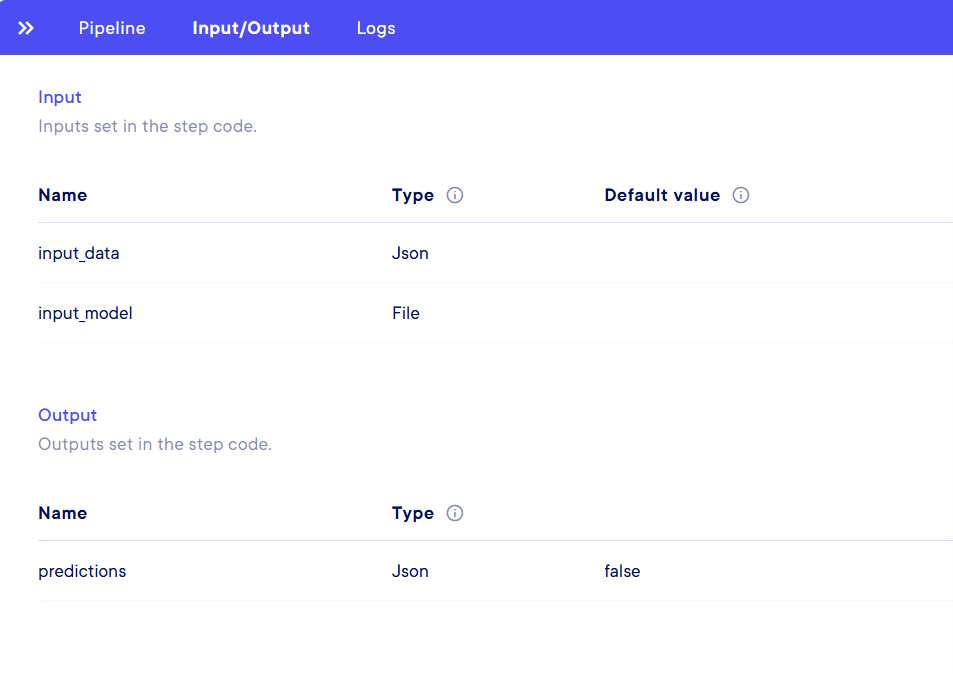
- The
Input/Output- Input : Name, Type and Default value for each Input
- Output : Name, Type and Default value for each Output
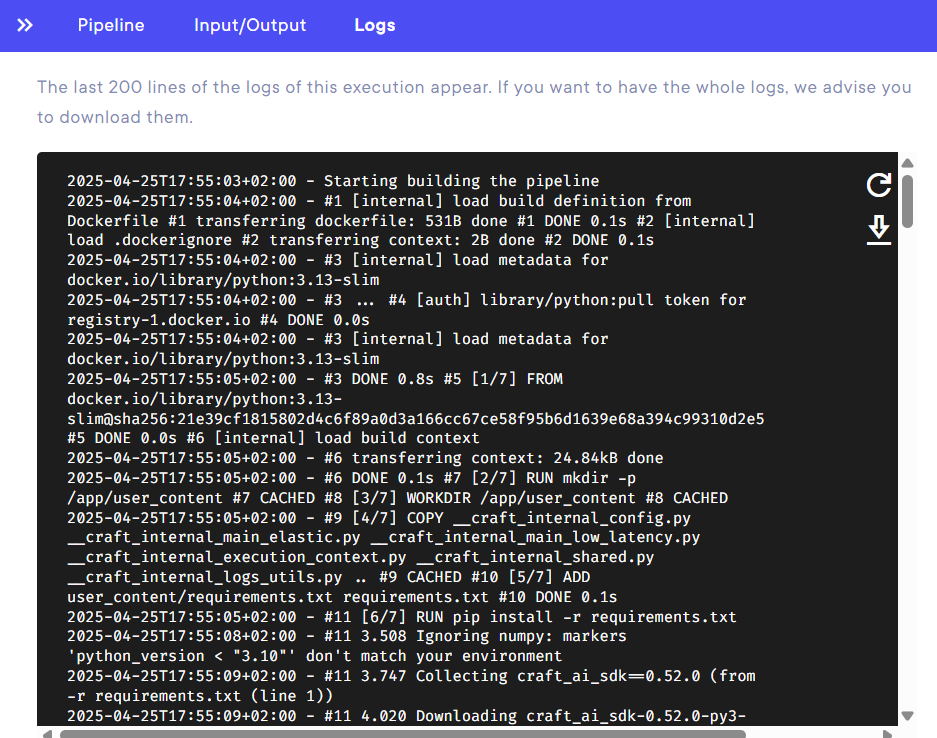
- The
Logs- displays the last 200 lignes of logs. You can refresh or download the whole log stack with two buttons on the right side.
Info
All the information on Deployments, how to create them, and have information about them are presented in the Deploy a pipeline documentation page.
Actions
Now, let's take a look at the actions that can be done on each pipeline (besides deploying them, for this, please go to the Deployment documentation)
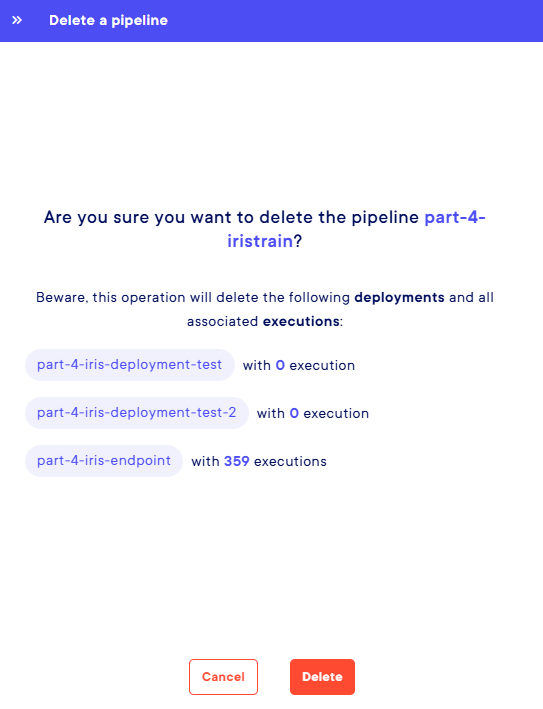
Basically, all you can do in the Platform is Delete a pipeline. You have 3 buttons that will let you do that :
- The one on the
Pipeline page, for which you need to select one or multiples pipelines with the checkboxes on the left side - One in the
...menu at the right of each pipeline line - One in the
Information panel, that will allow you to delete the specific pipeline you are looking at
For a selection of any of these 3 starting point, you will be presented with a side panel on the right asking you to confirm the deletion, along with some information of what you will lose if you do : The executions, their logs and deployments associated with this pipeline.